UA Keyhole Kitchen Garden
Recently we installed a beautiful keyhole kitchen garden in Upper Arlington.
This was done for a longtime client who recently moved and wanted a new kitchen garden for her space.
Our wonderful garden consultant, Robin spearheaded this garden design and project so I’m going to let her tell you how the day went. Enjoy!
I woke up to the sound of thunder and pouring rain, but was relieved when I checked the radar to see that the storms would pass through by 8:00 AM. I checked with the head of the landscaping crew while eating my breakfast, but we were all set for an 8:00 start time. Only a 30 minute delay - good news! Our client has had a rough year health-wise, and after a move to a new house, a kitchen garden ready for spring planting was just what she and her family needed. I did not want this project to be postponed!
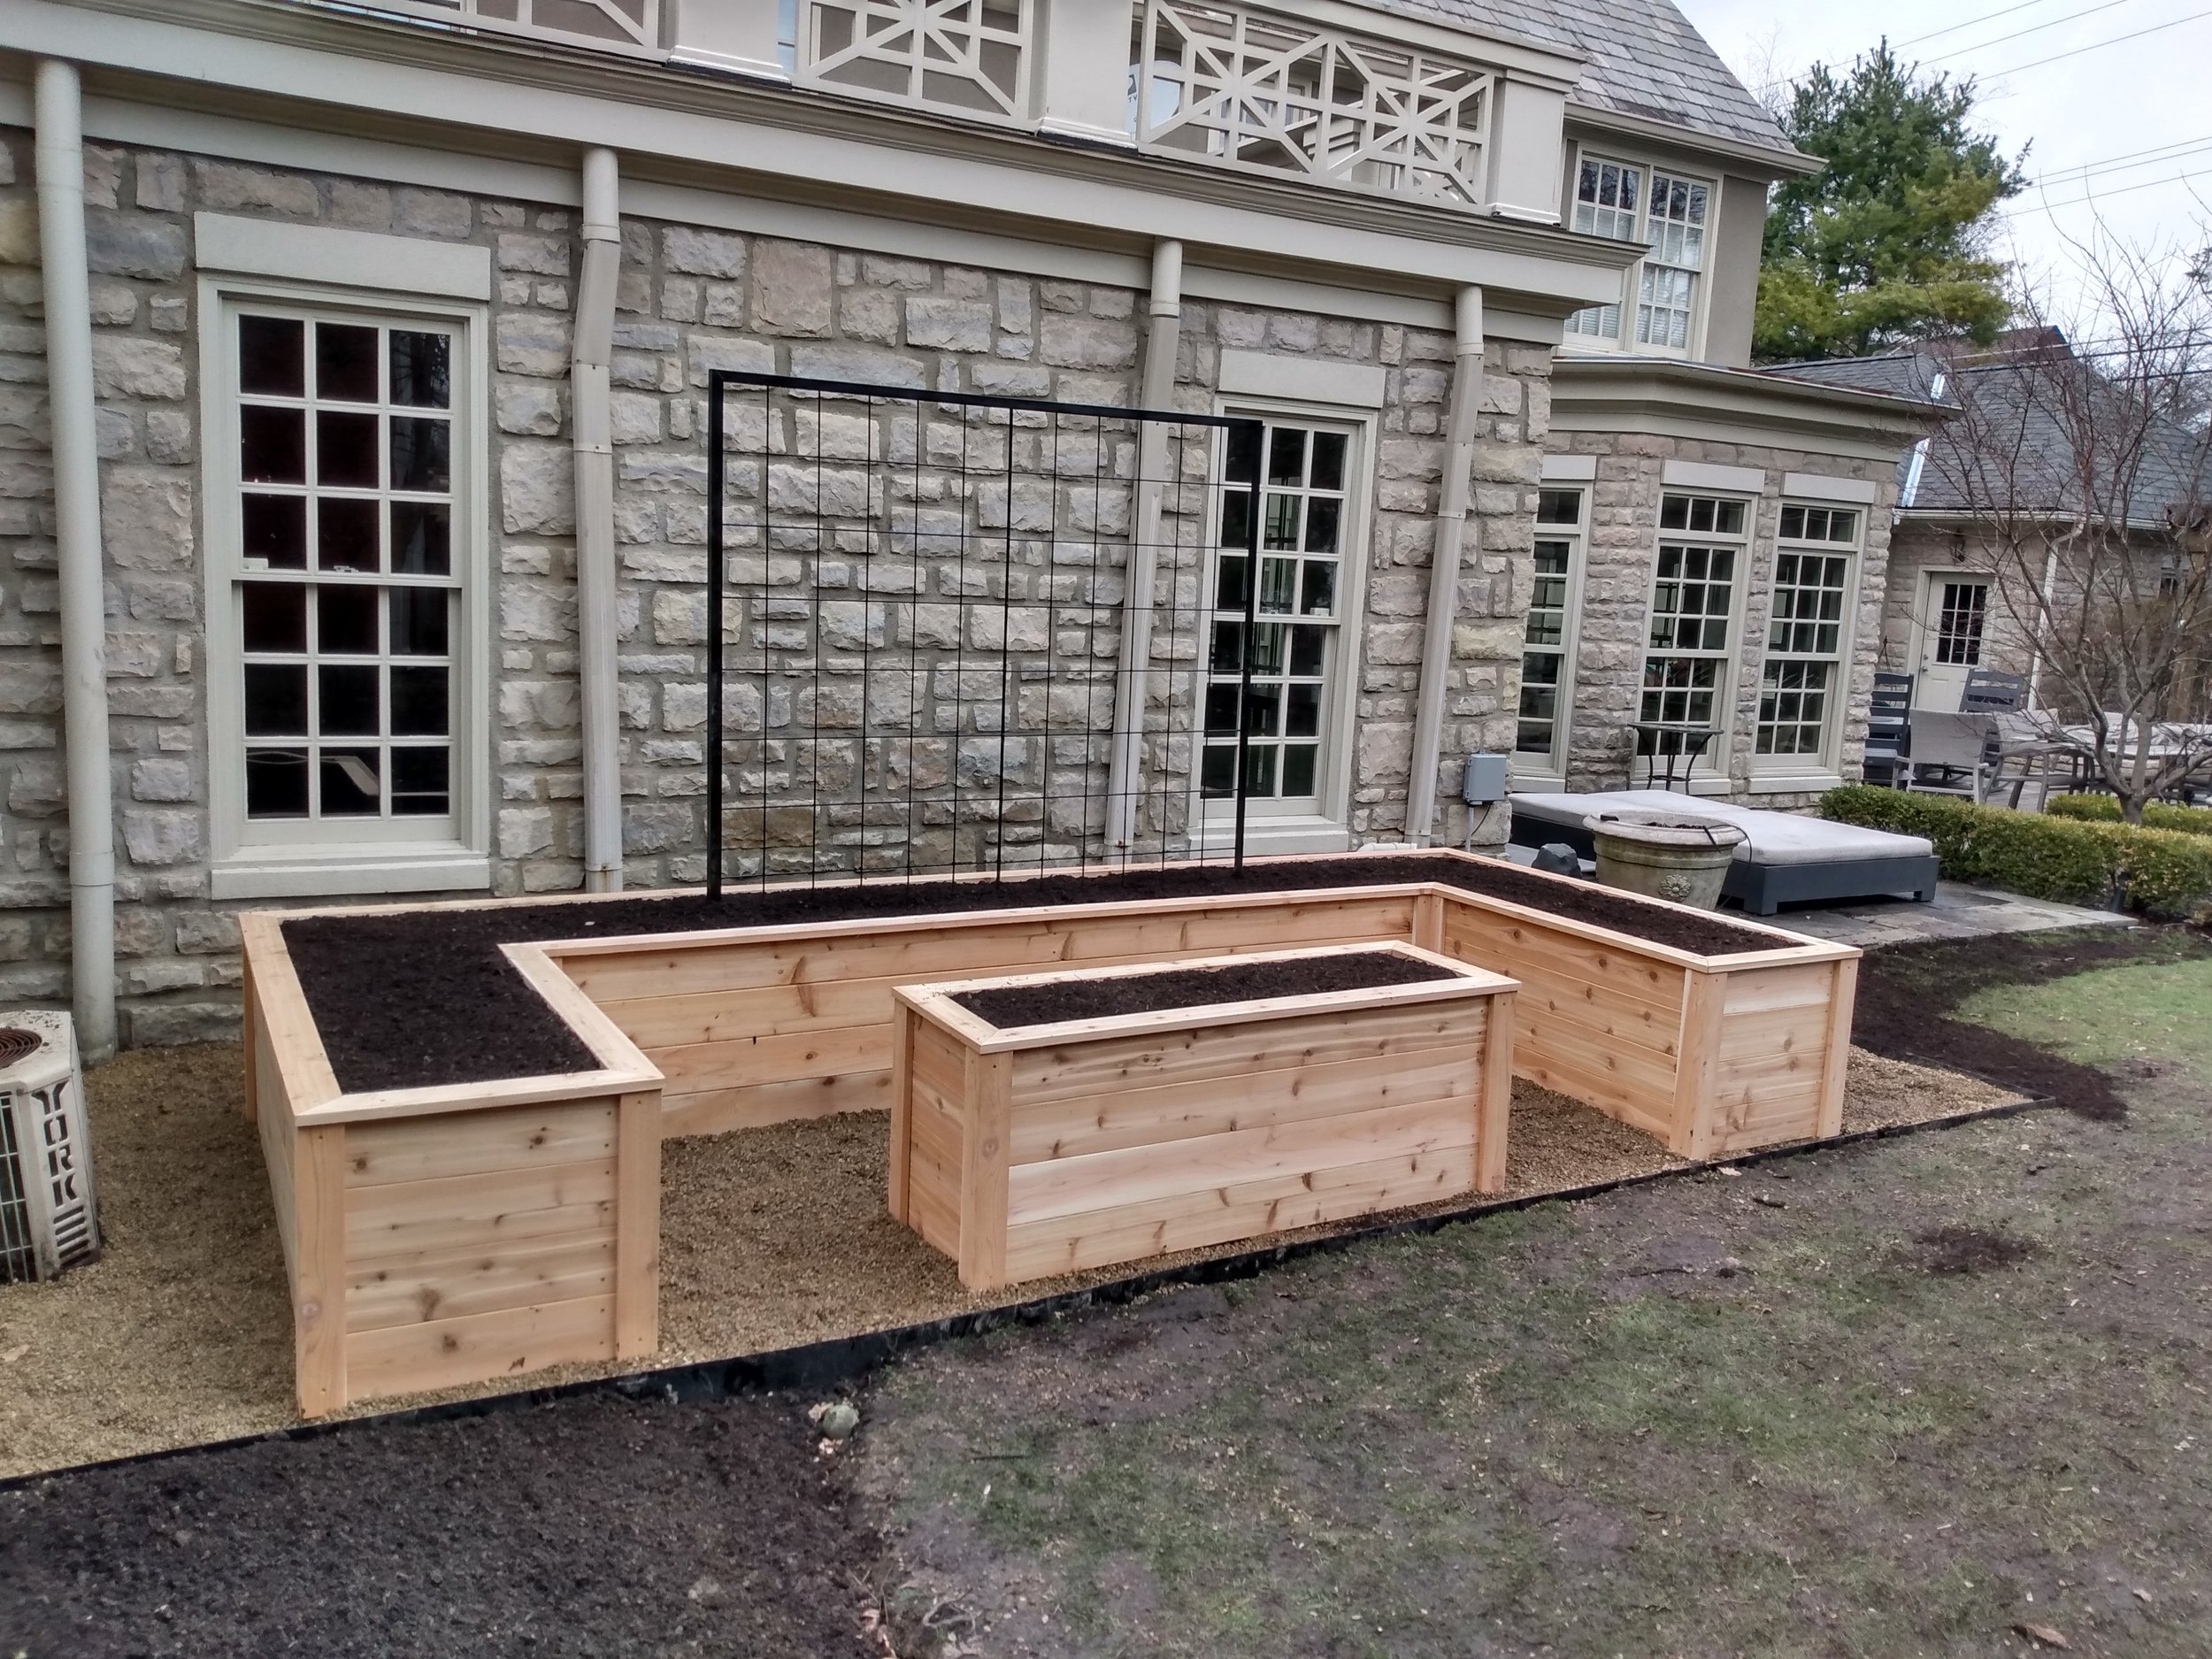
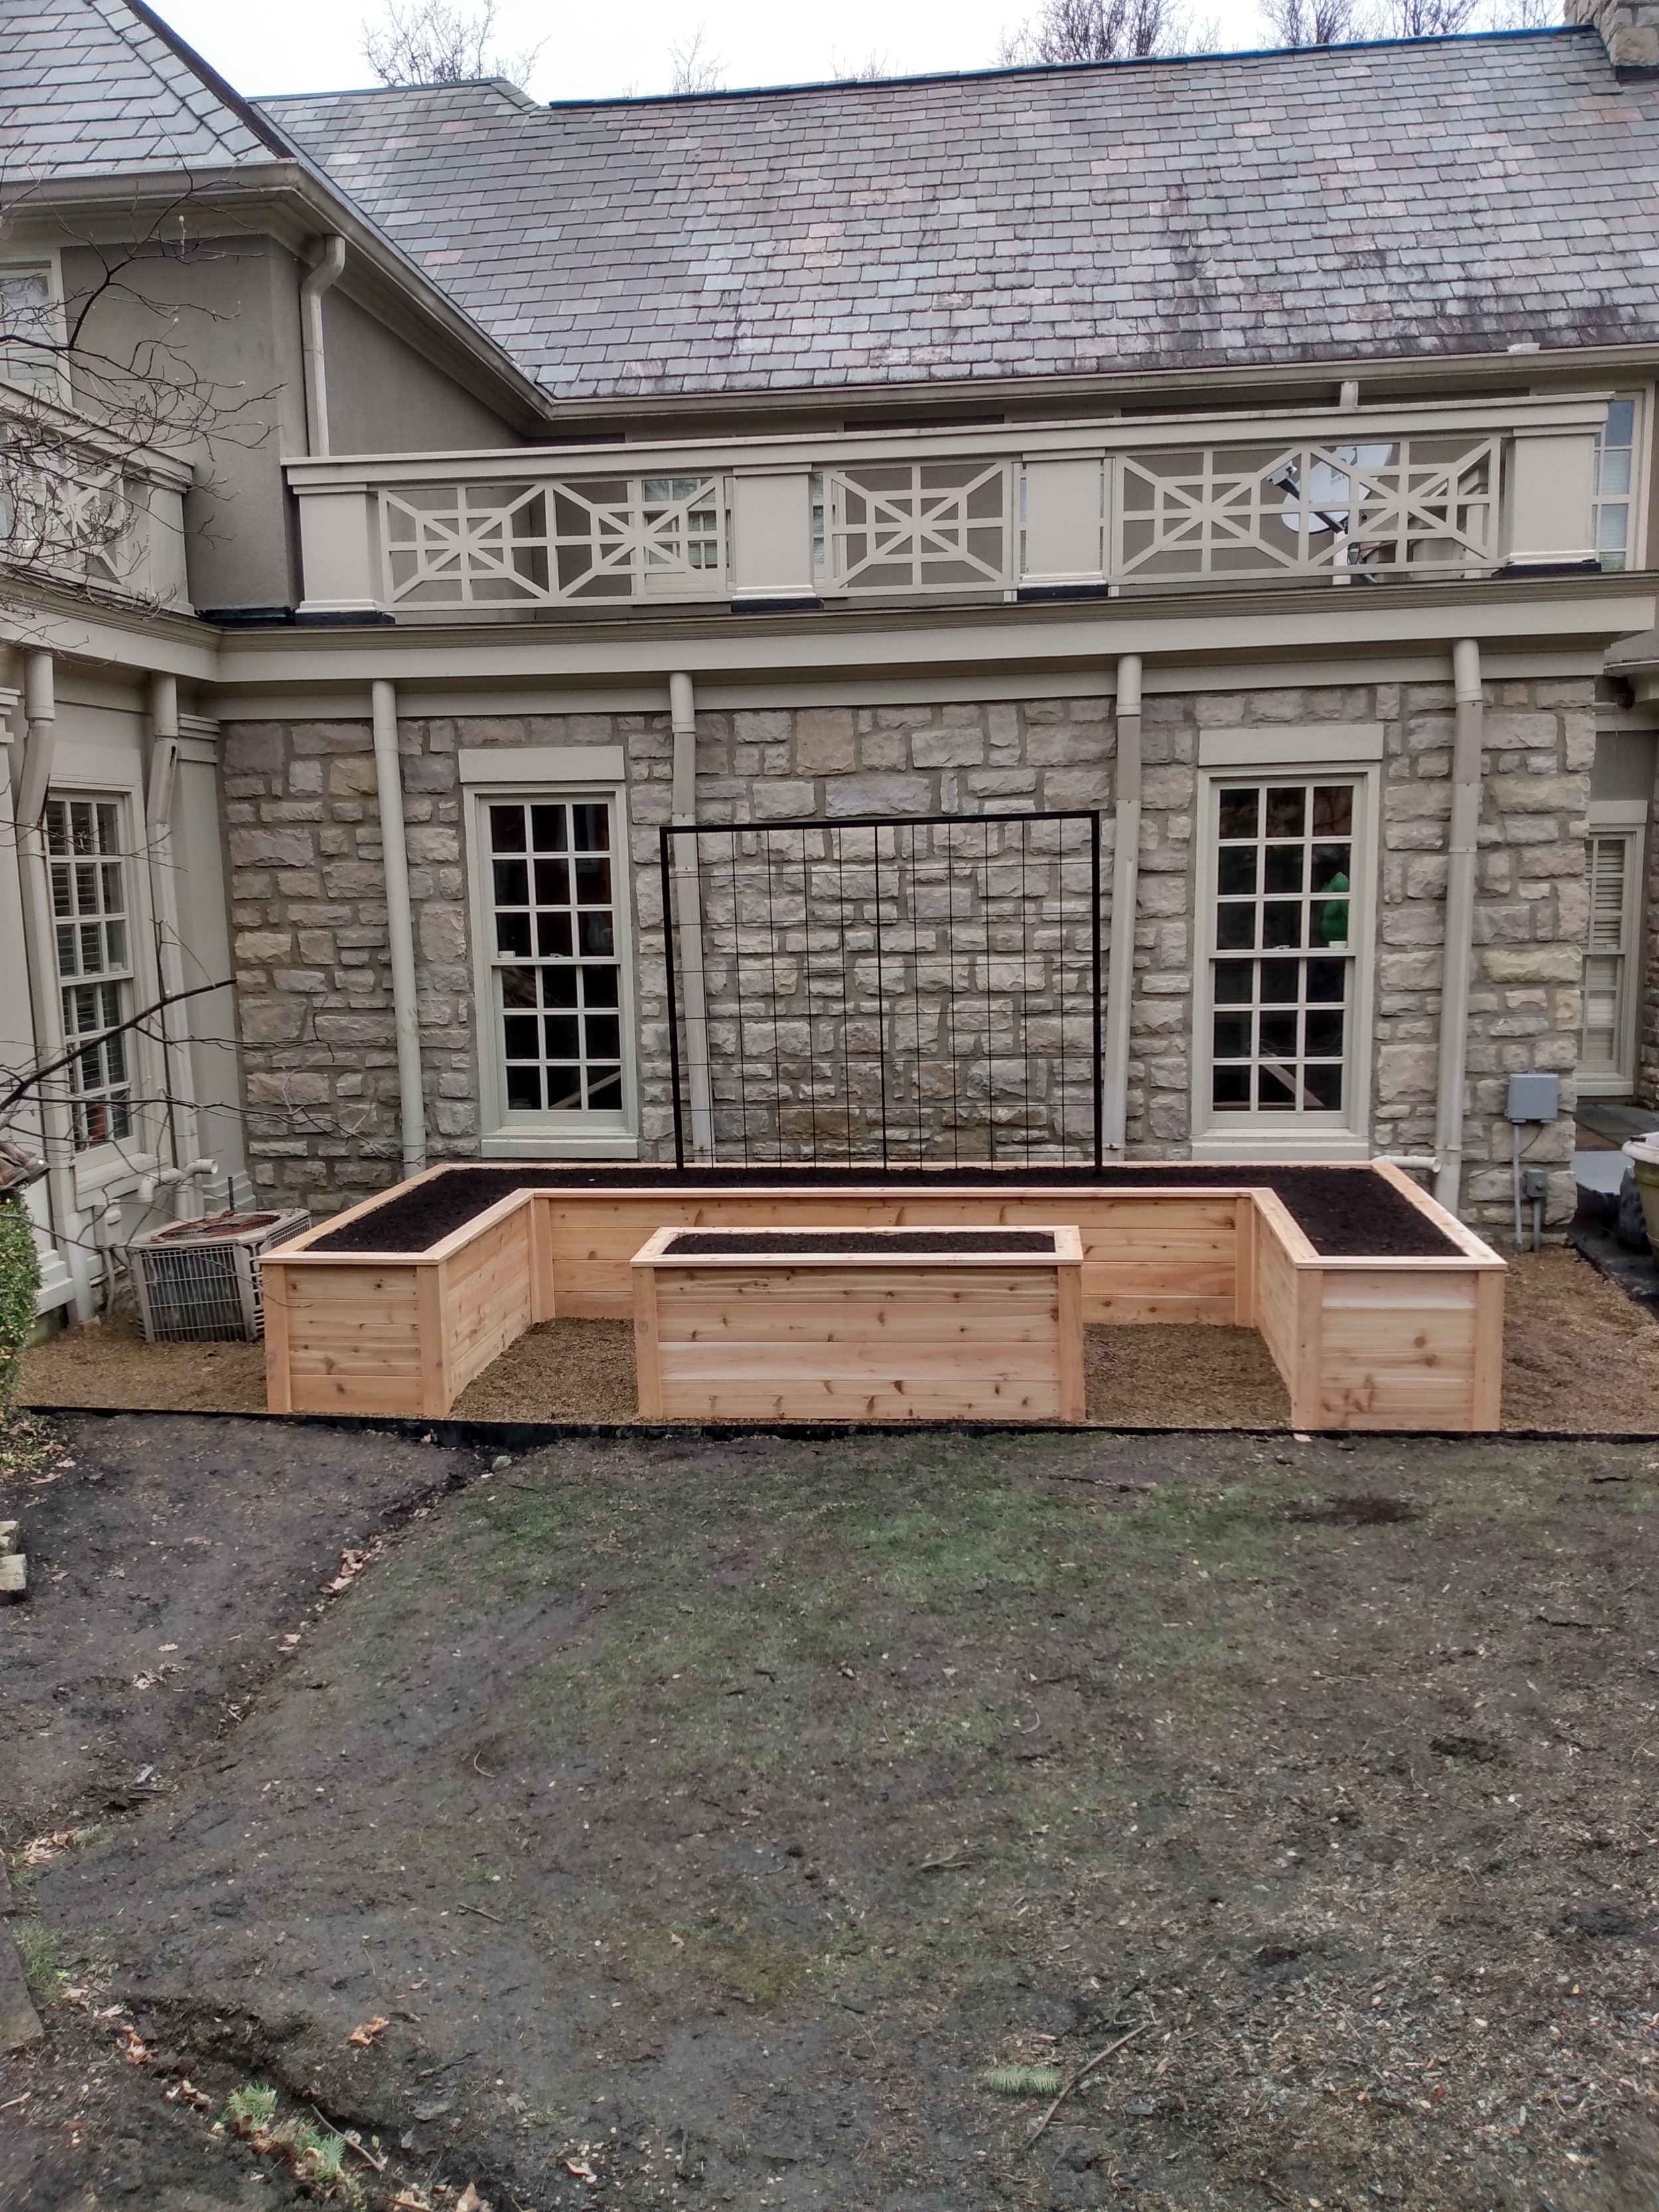
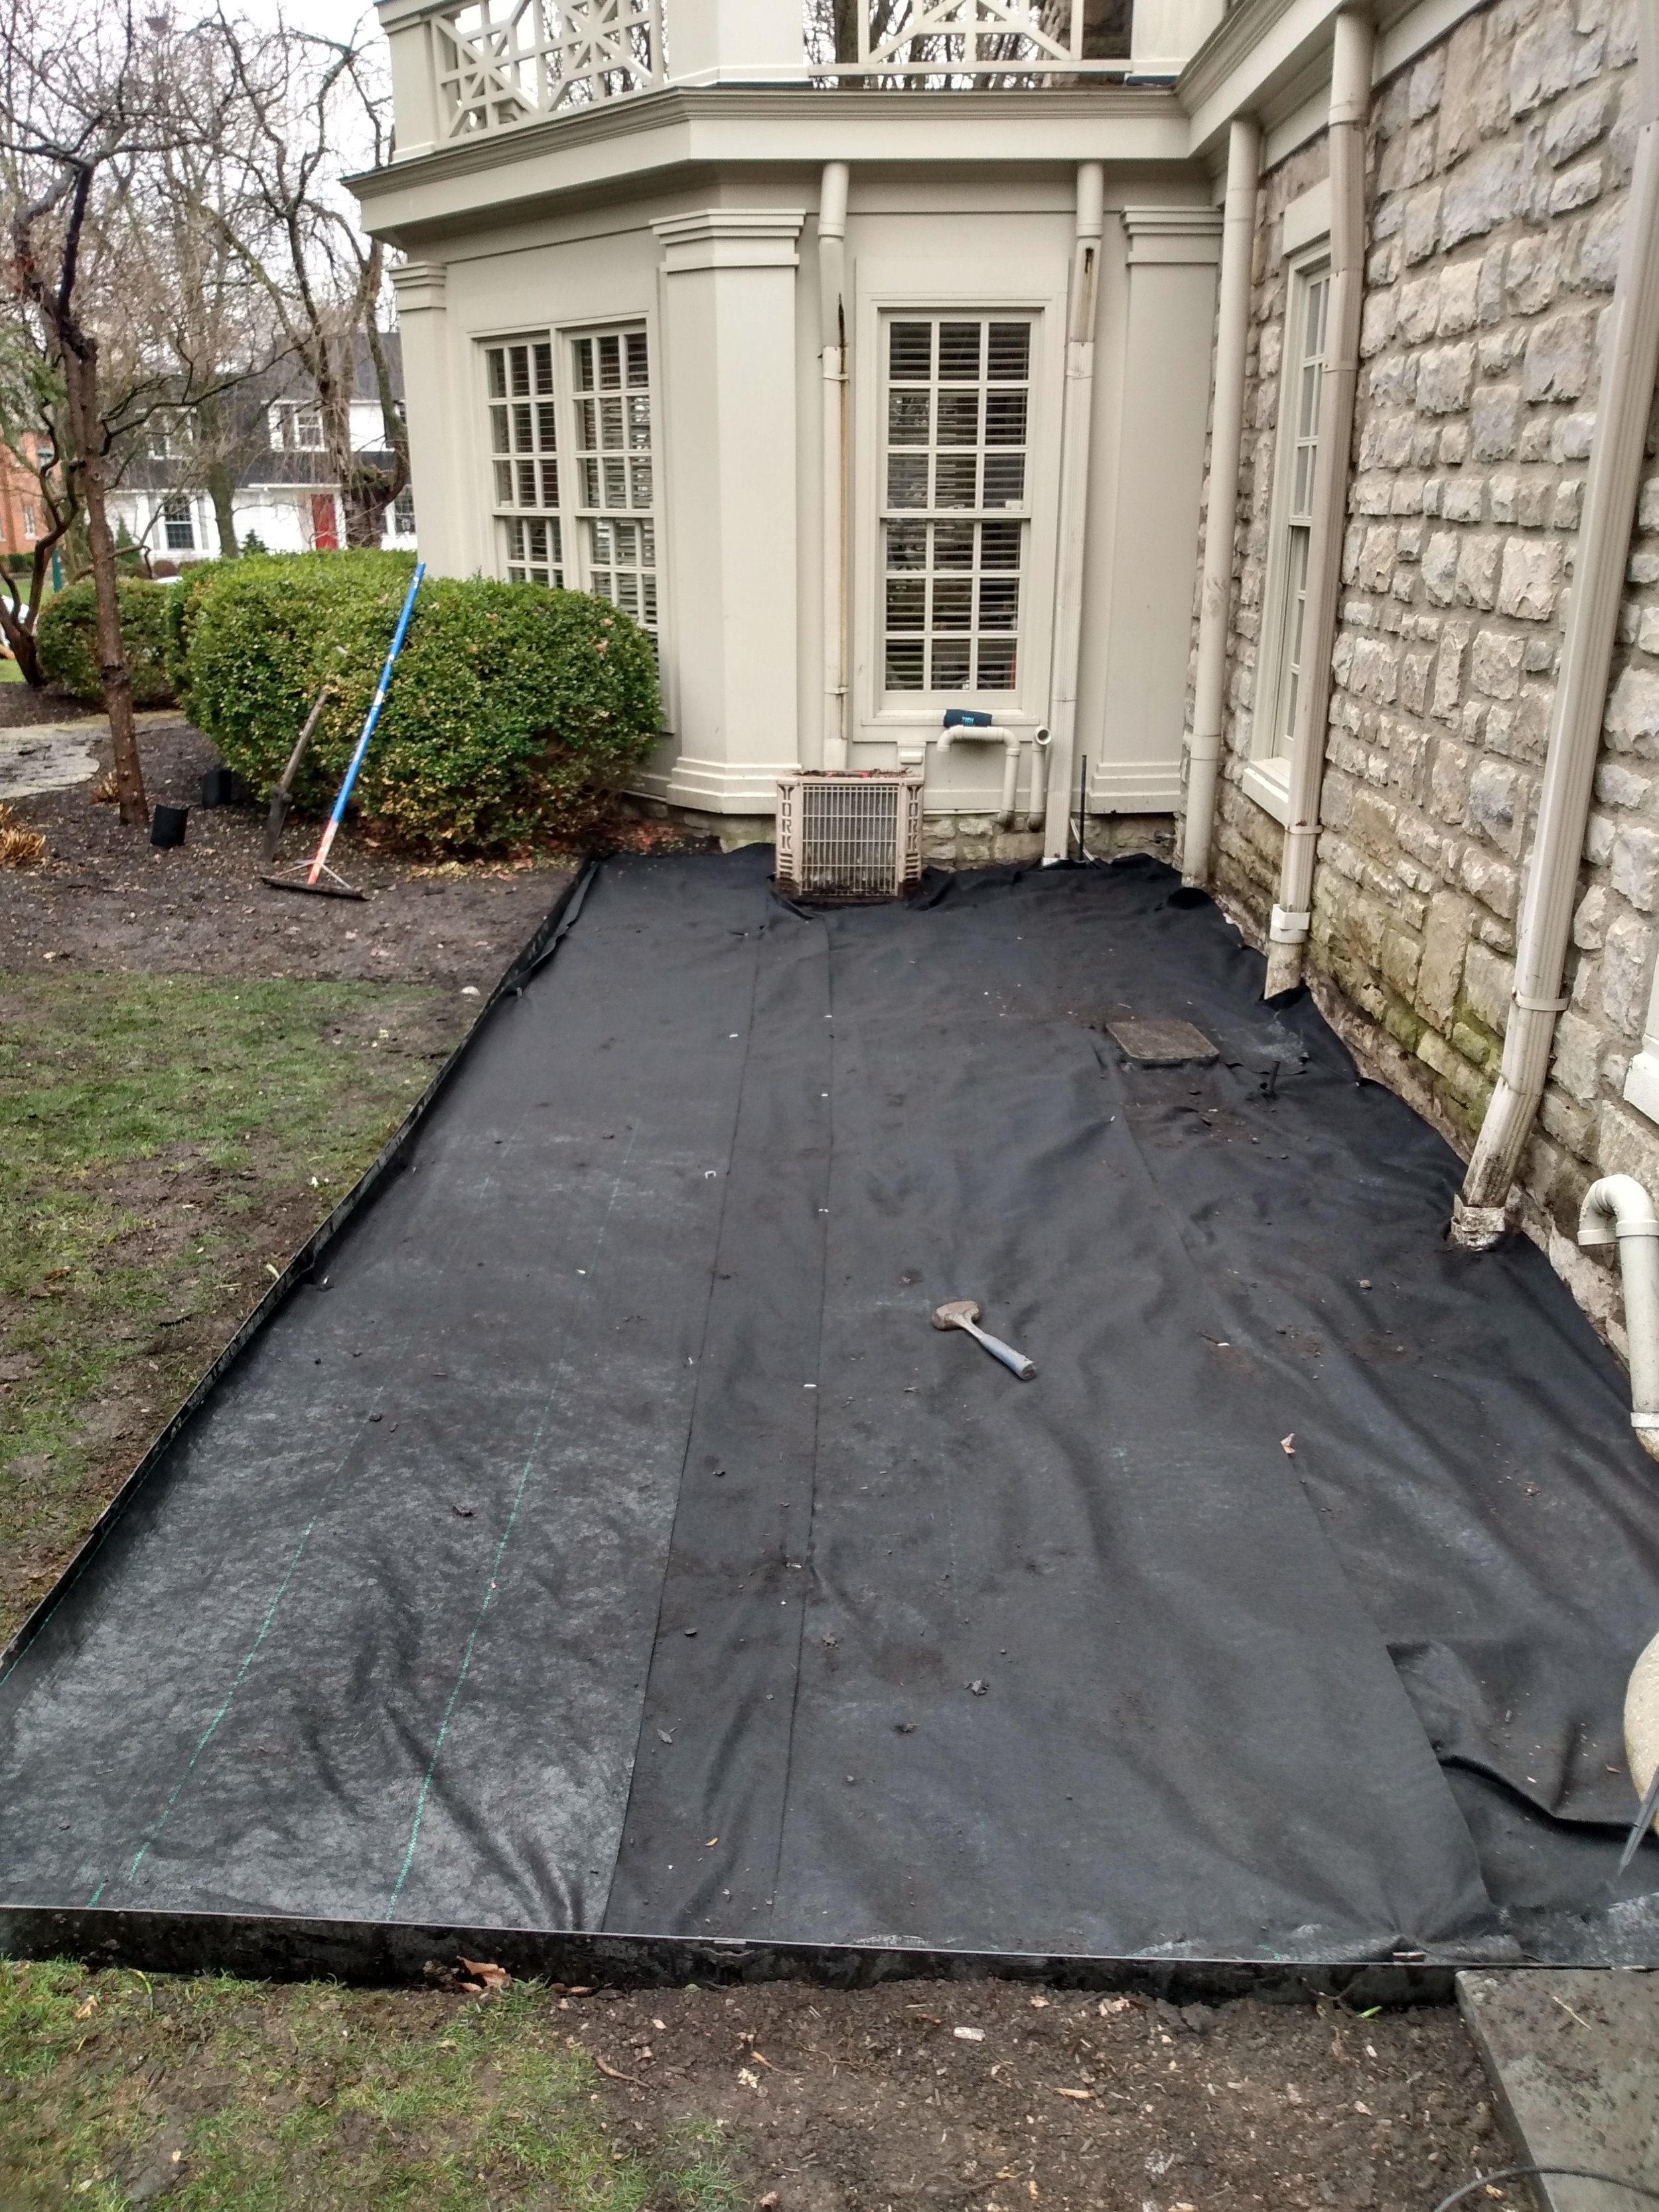
The house is a beautiful stone home in historic Upper Arlington. The backyard has a lovely bluestone patio that connects to an outdoor kitchen and dining area. A kitchen garden adjacent to this patio will be the perfect complement to outdoor summer dinners. This kitchen garden is a keyhole design, with a large U-shaped bed with a smaller bed nestled inside of it. It will look gorgeous!
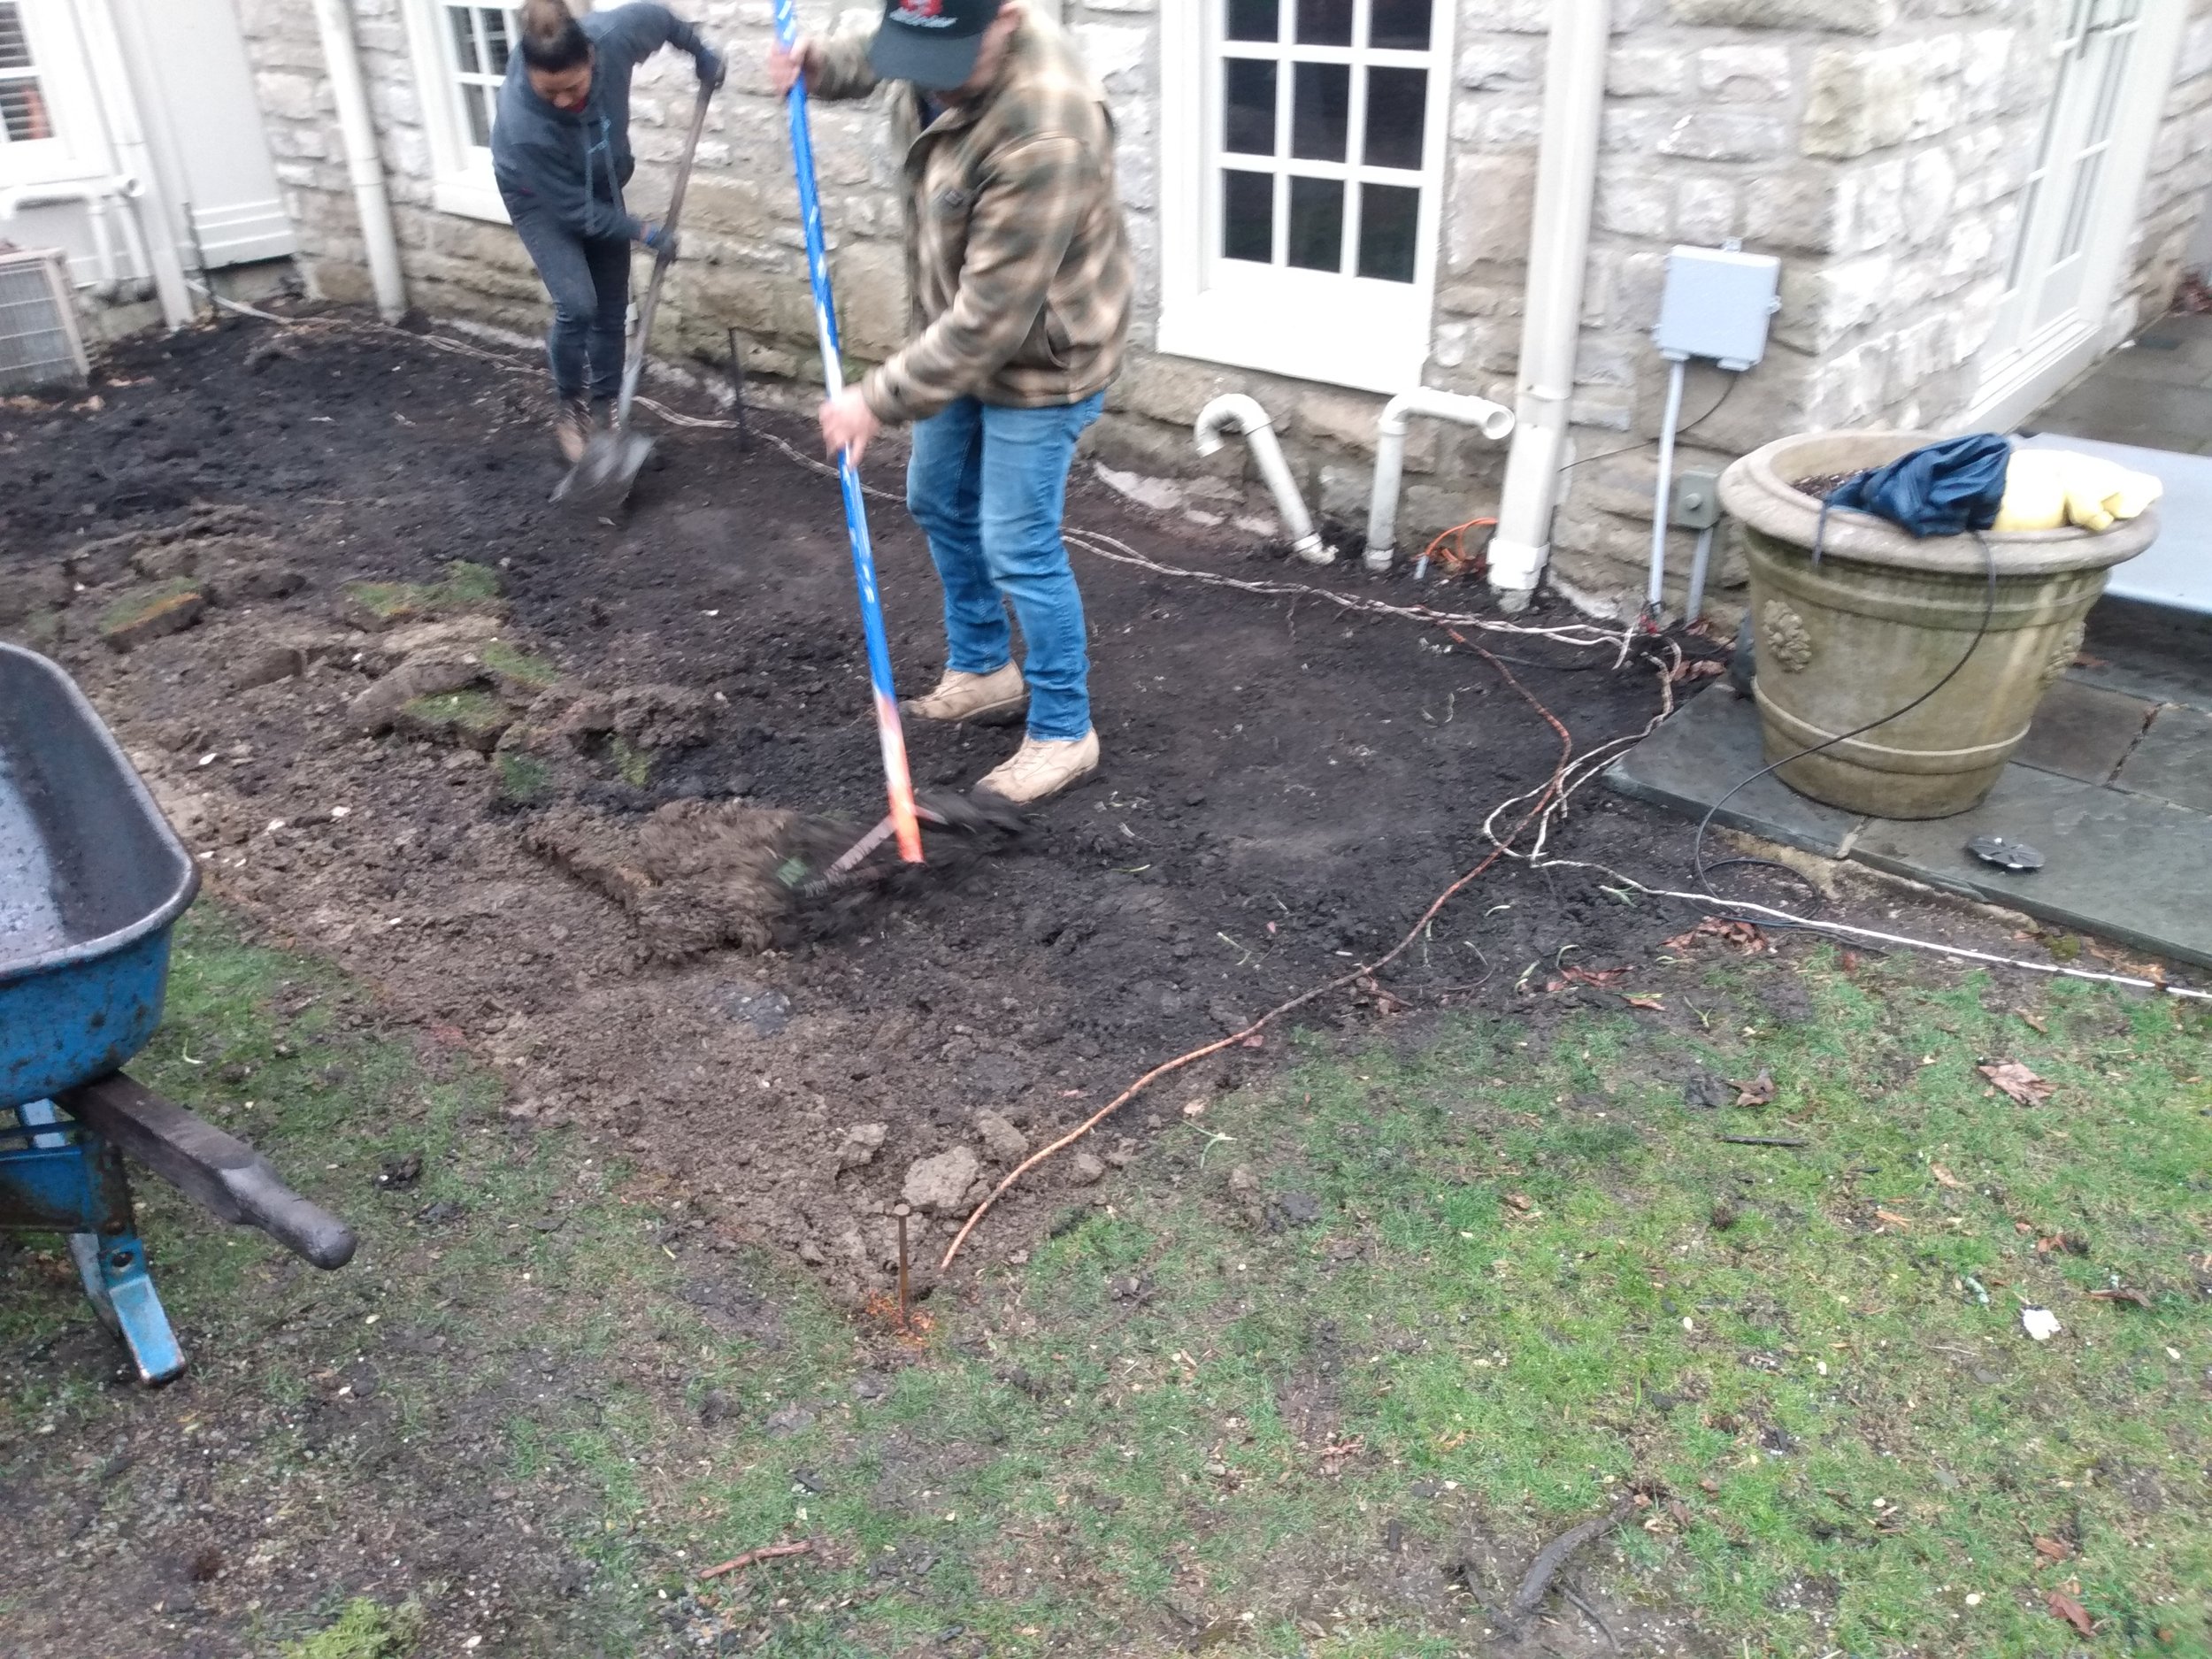
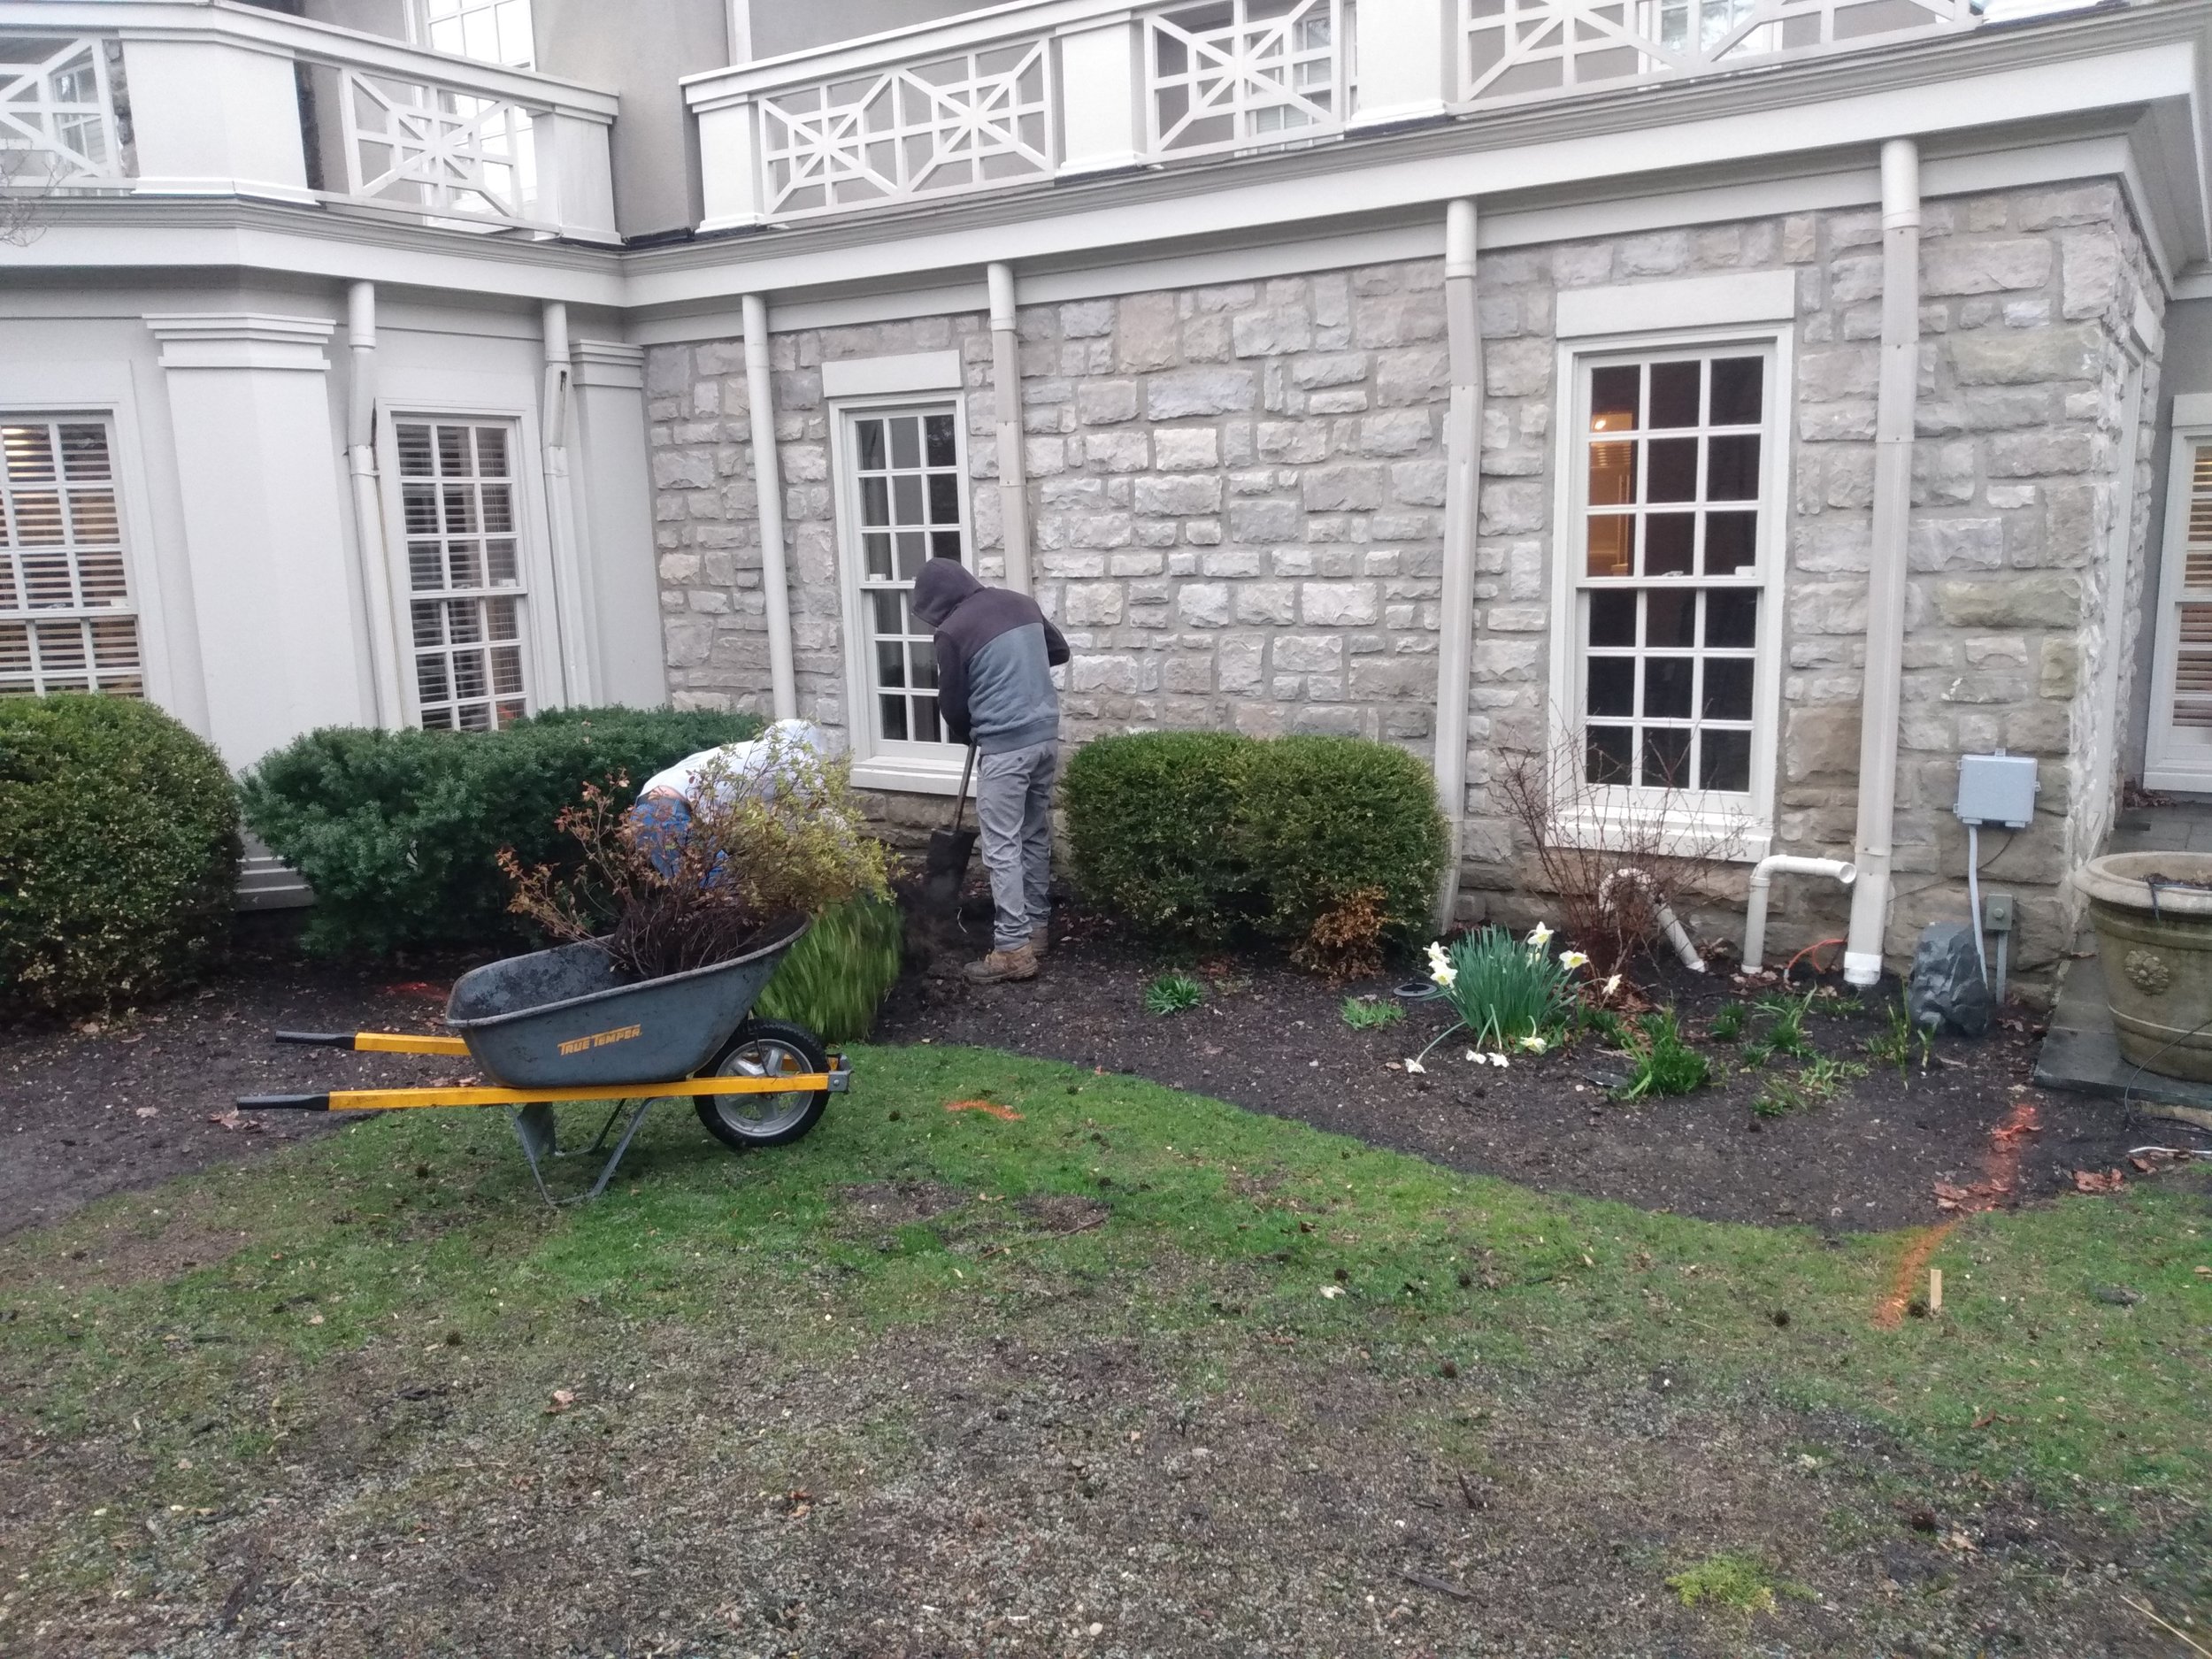
Half an hour after starting, the bushes and sod were cleared and taken to the truck to be hauled away. Unfortunately the crew uncovered access to the sprinkler system that was previously buried and no one knew was there. We had to adjust our plan and move the raised beds further away from the wall. We extended the entire garden space out by 6 inches. All was good.
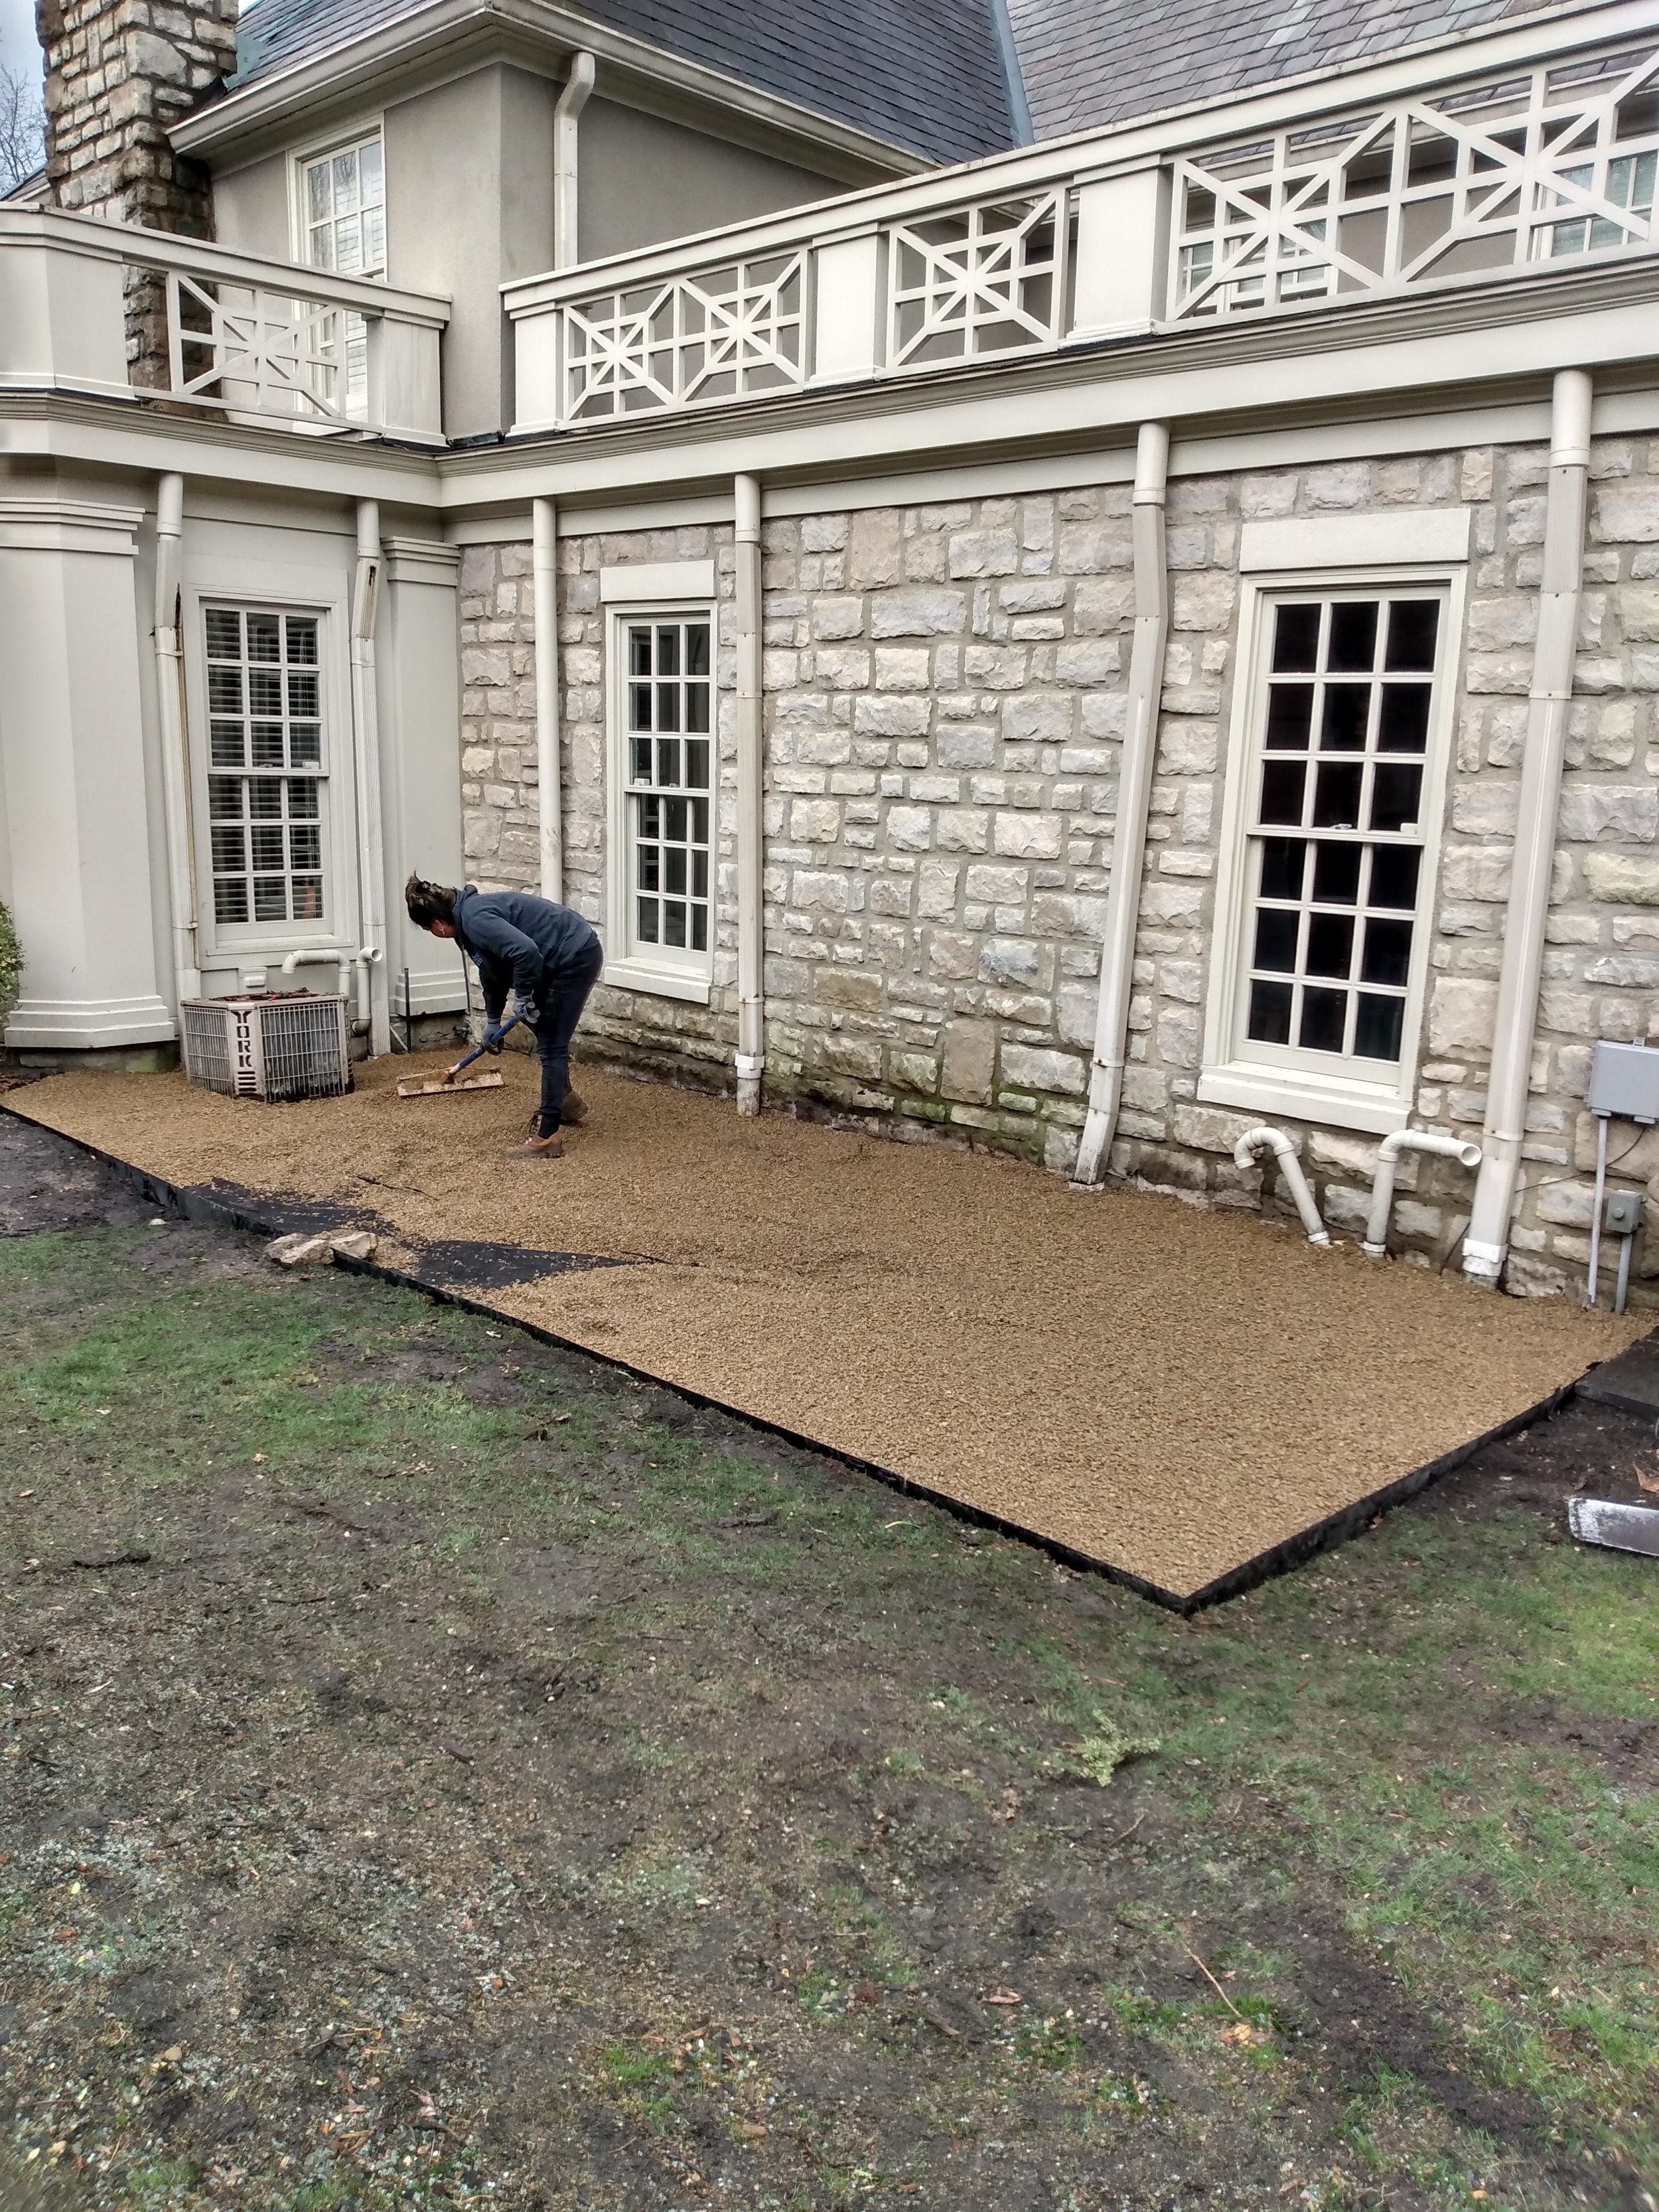
After clearing out the top 4 inches or so of soil and plant debris, the ground was leveled and the steel edging was installed. The edging makes the garden space look tidy, and helps keep the gravel out of the grass and the grass out of the gravel. Next, the landscape fabric was laid. This will keep weeds from growing into the gravel and raised beds.
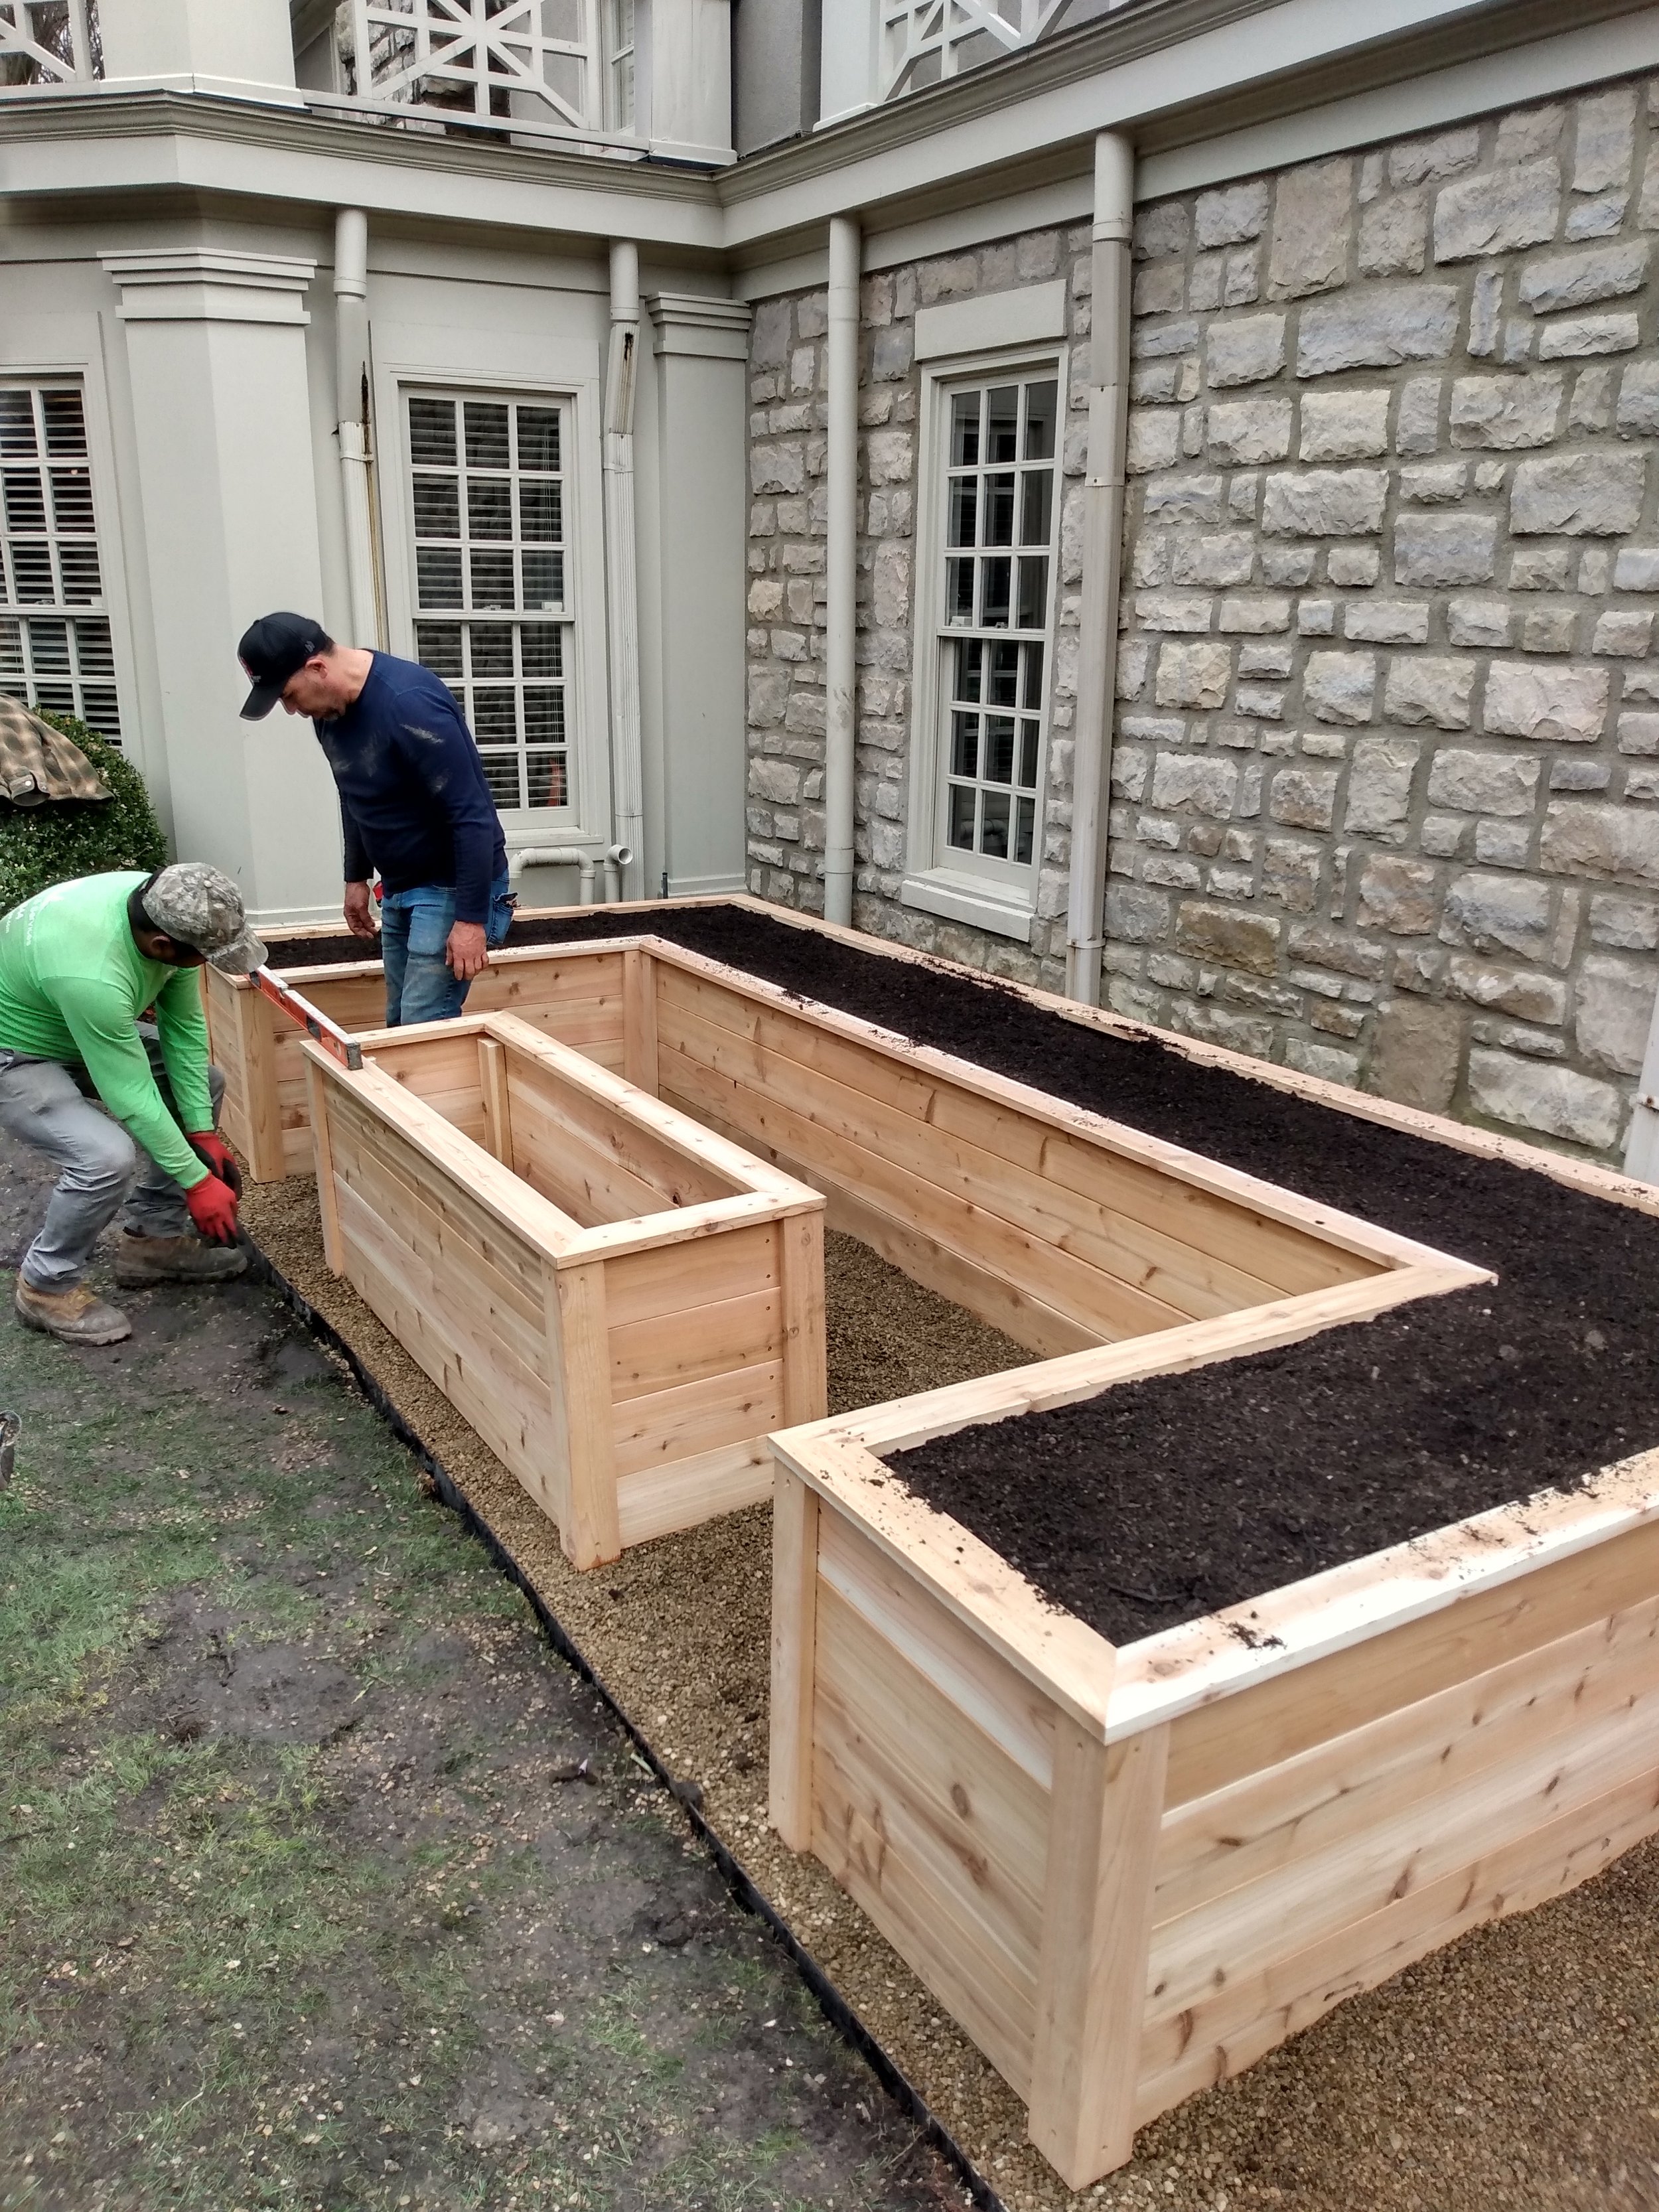
Just when the landscape crew was finishing up with the landscape fabric, the carpenter arrived to build the cedar raised garden beds. He builds as much of the beds as he can in his workshop, and brings the pieces to the job site for the final assembly. The garden design for this project includes a 14-foot long bed, so this was quite a heavy load to carry. He certainly got his workout in today, unloading all of the long pieces from his truck! After a quick coffee break to recharge, he was ready to start assembling. In about 25 minutes, the small bed was complete - this was the "hole" in the keyhole design. Both the U-shaped bed and the smaller bed are 2 feet high, with trim to give it a finished look (and is a handy place to set gardening tools and a cold beverage when you are working in the garden).
While the carpenter was assembling the beds, the landscape crew was filling the garden space with pea gravel, which was dumped yesterday in a huge pile on the driveway in front of the house. The gravel has hints of beige which nicely complement the color of the stone house. Wheelbarrow by wheelbarrow, the garden area filled up. The 3-4 inches of gravel is so important - it helps create a distinct space for the kitchen garden, allows for adequate drainage, increases the life of the cedar boards, and prevents having to clip the grass around the raised beds.
After every last bit of gravel was moved to the garden area and the U-shaped bed was assembled, the raised beds were installed. It is always exciting to see them placed in their permanent location. We made sure they were centered on the wall and level, and then the crew repeated the wheelbarrow process, this time with soil and compost to fill the beds. Before they got too full, we added the final touch - an extra large panel trellis centered right between the two windows. This allows climbing vegetables like peas and cucumber lots of room to grow without taking up precious space in the garden. Plus, it looks really pretty! I added a bit of organic soil conditioner and fertilizer, and we were all done!
Now, we just have to wait a couple of more weeks for the weather to warm up, and we can fill the garden with all sorts of cool weather loving plants. I can't wait!
A special thanks to our wonderful client who trusted us yet again with her beautiful space!
Ready to start your dream kitchen garden?